I used the Easter holidays to work on the painting of the fairing and the electrical wiring. I installed the Dispatch 1 distribution box under between the battery and the (new) saddle. Lots of cables needed to be attached to the bike. As I didn’t want to cut them, they had to be placed somewhere.
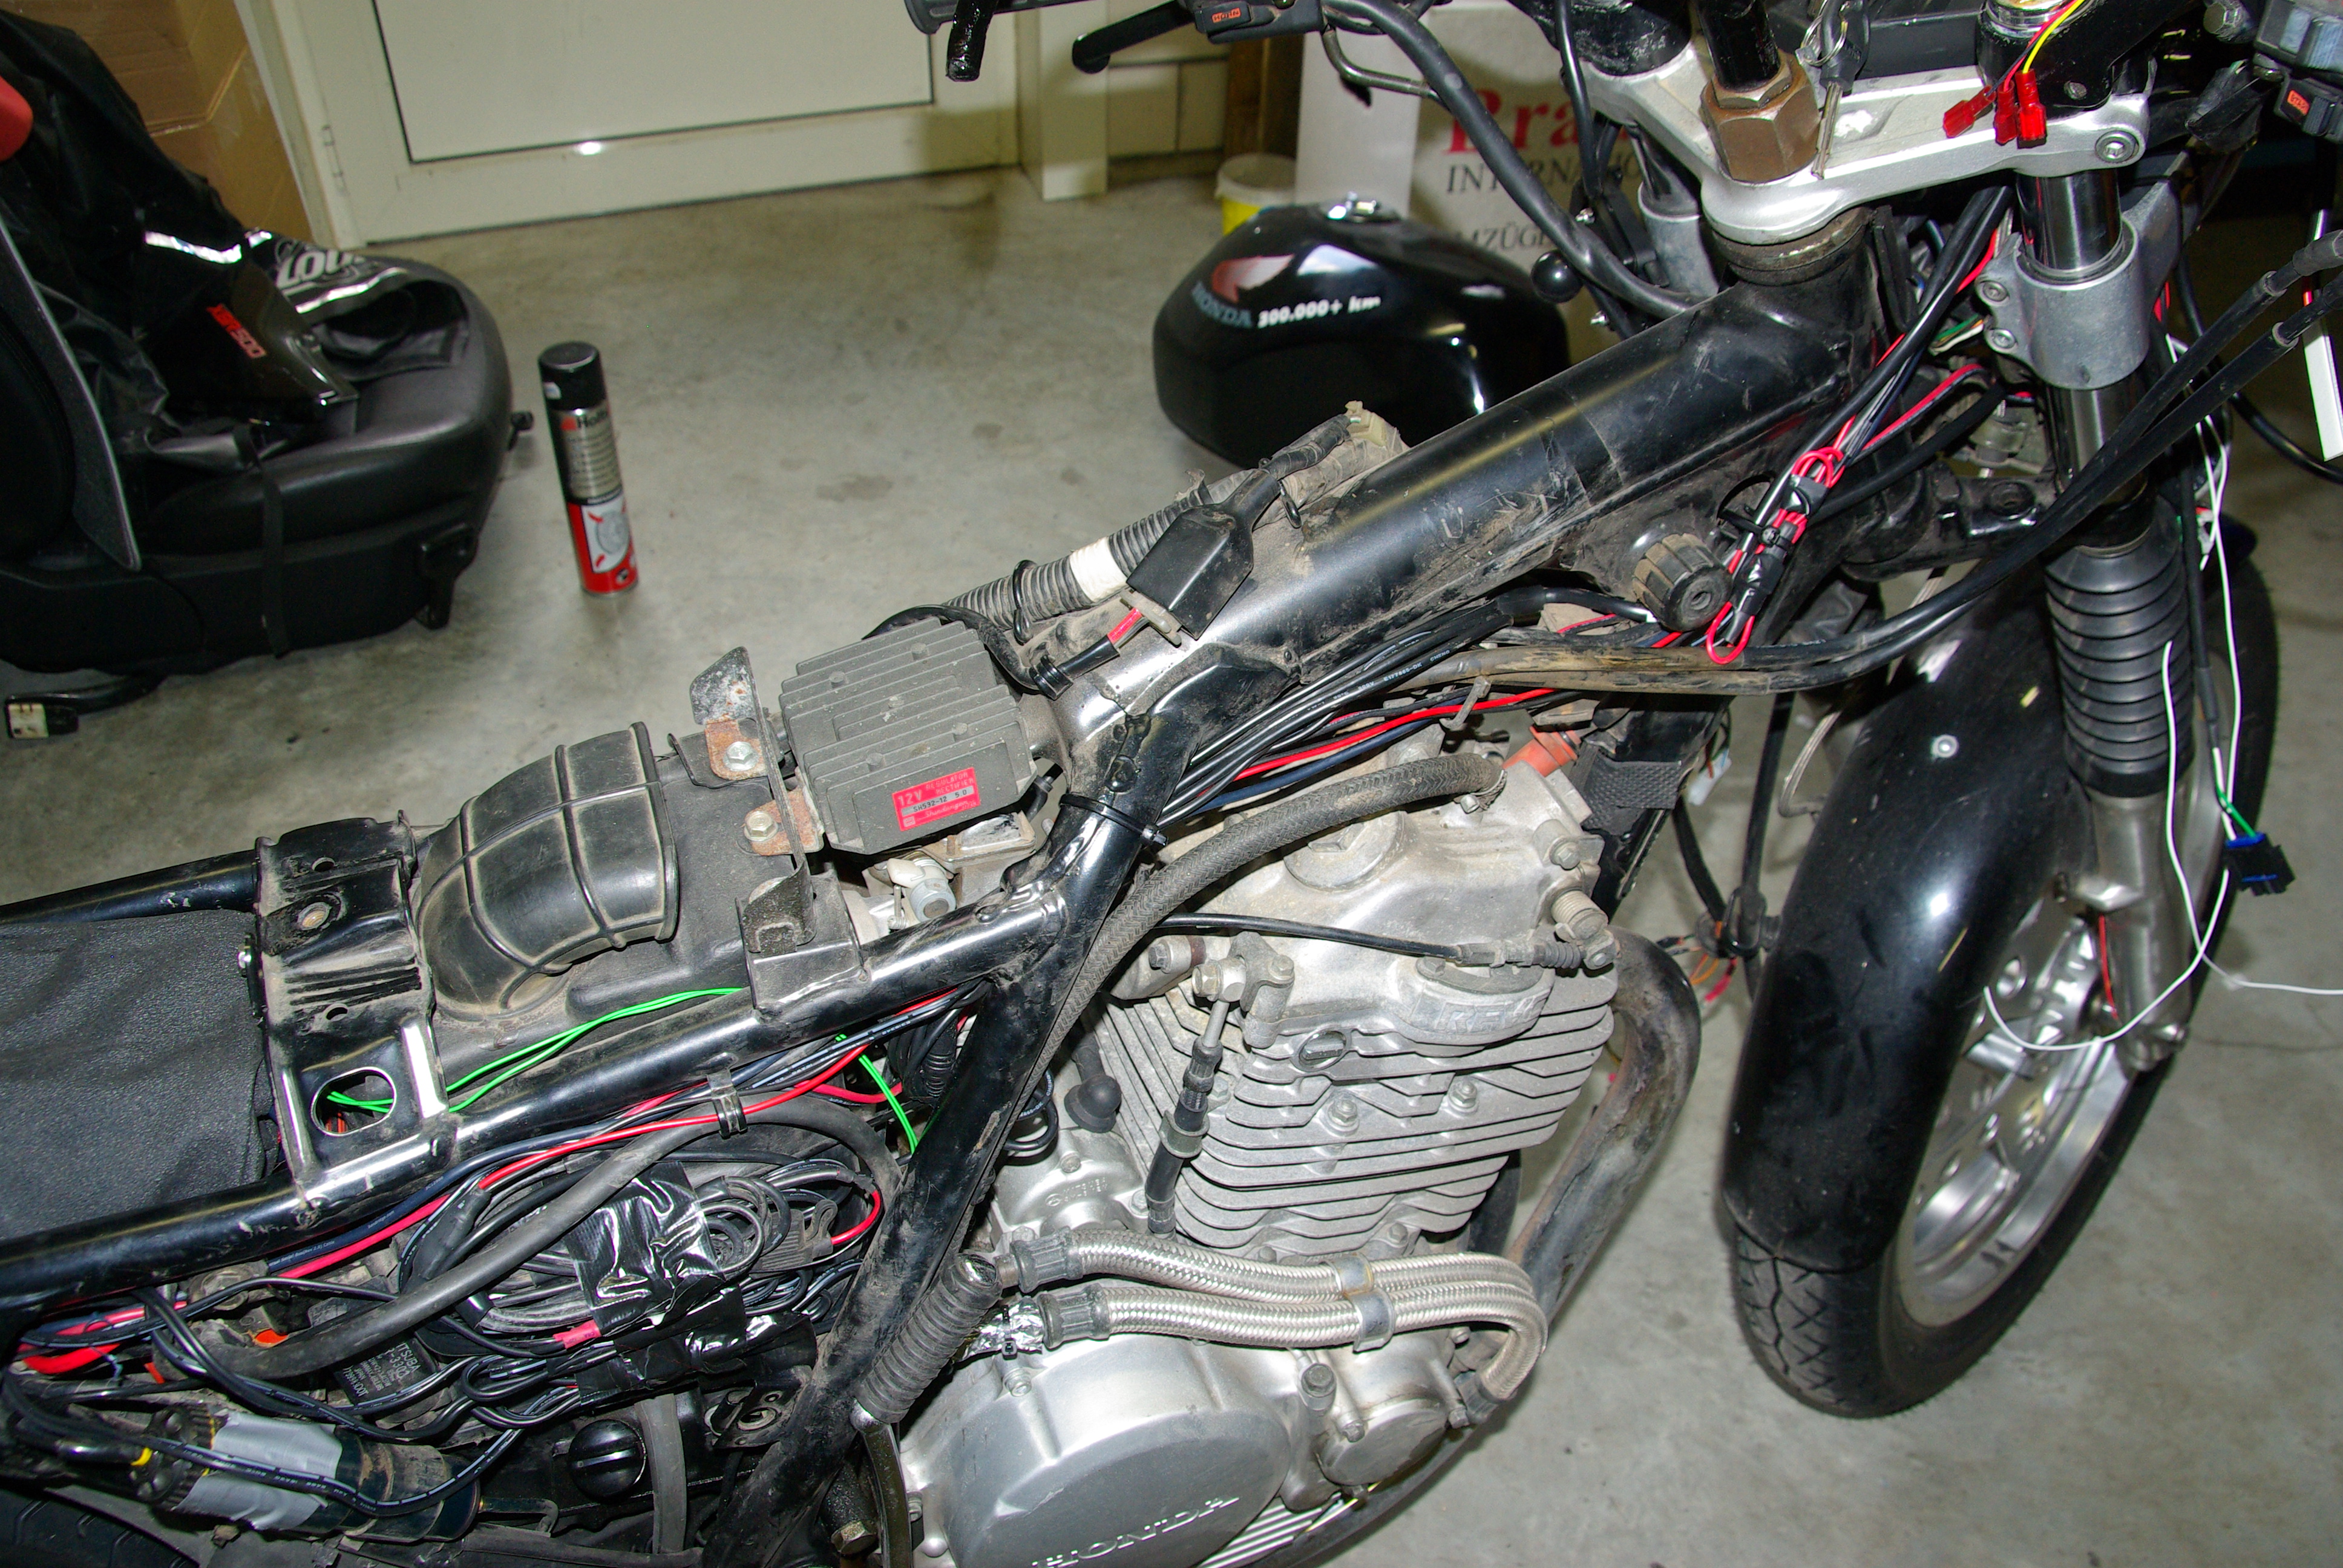
The only place near the frame is under the side covers. Using all the little space there, I crammed the cables under the right cover and the auxiliary fuel line and the CDI box under the left cover. I had to move the CDI box, as the distribution box needs quite some space. I am considering to reduce the box in height, another 3 mm would be good so it is not pressed down by the saddle.

In the last post, I had no picture for the Krista auxiliary LED lights. I did a quick night ride test to take some pictures that demonstrate the massive light output of these flooders. During the ride, a rabbit crossed my way, its eyes were brightly glowing red as I had the Kristas on full power. Probably its retina was melting in this moment…an impressive sight. It gives some piece of mind knowing that I can detect the critters a lot earlier before they jump on the road.


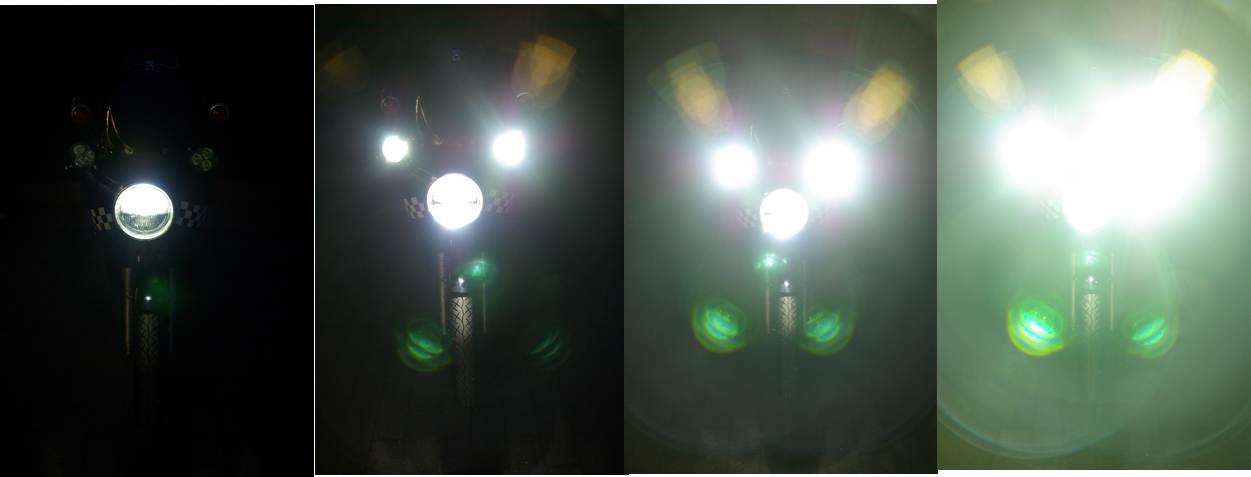
22W, 22W+22W+8W, 22W+22W+36W, 22W+22W+72W

This brings me to the next topic. All the wiring had a purpose, of course. I installed the distribution box of the Dispatch 1 under the saddle and connected the electrical devices to it: The first GPS, the second GPS, the V1, the iPad, the smartphone and a LED lightning for the roadbook holder. They can be swiched on or off individually via the display that is placed in the cockpit. I mounted the holder of the new second GPS today when a small pin of the power supply broke  .
.
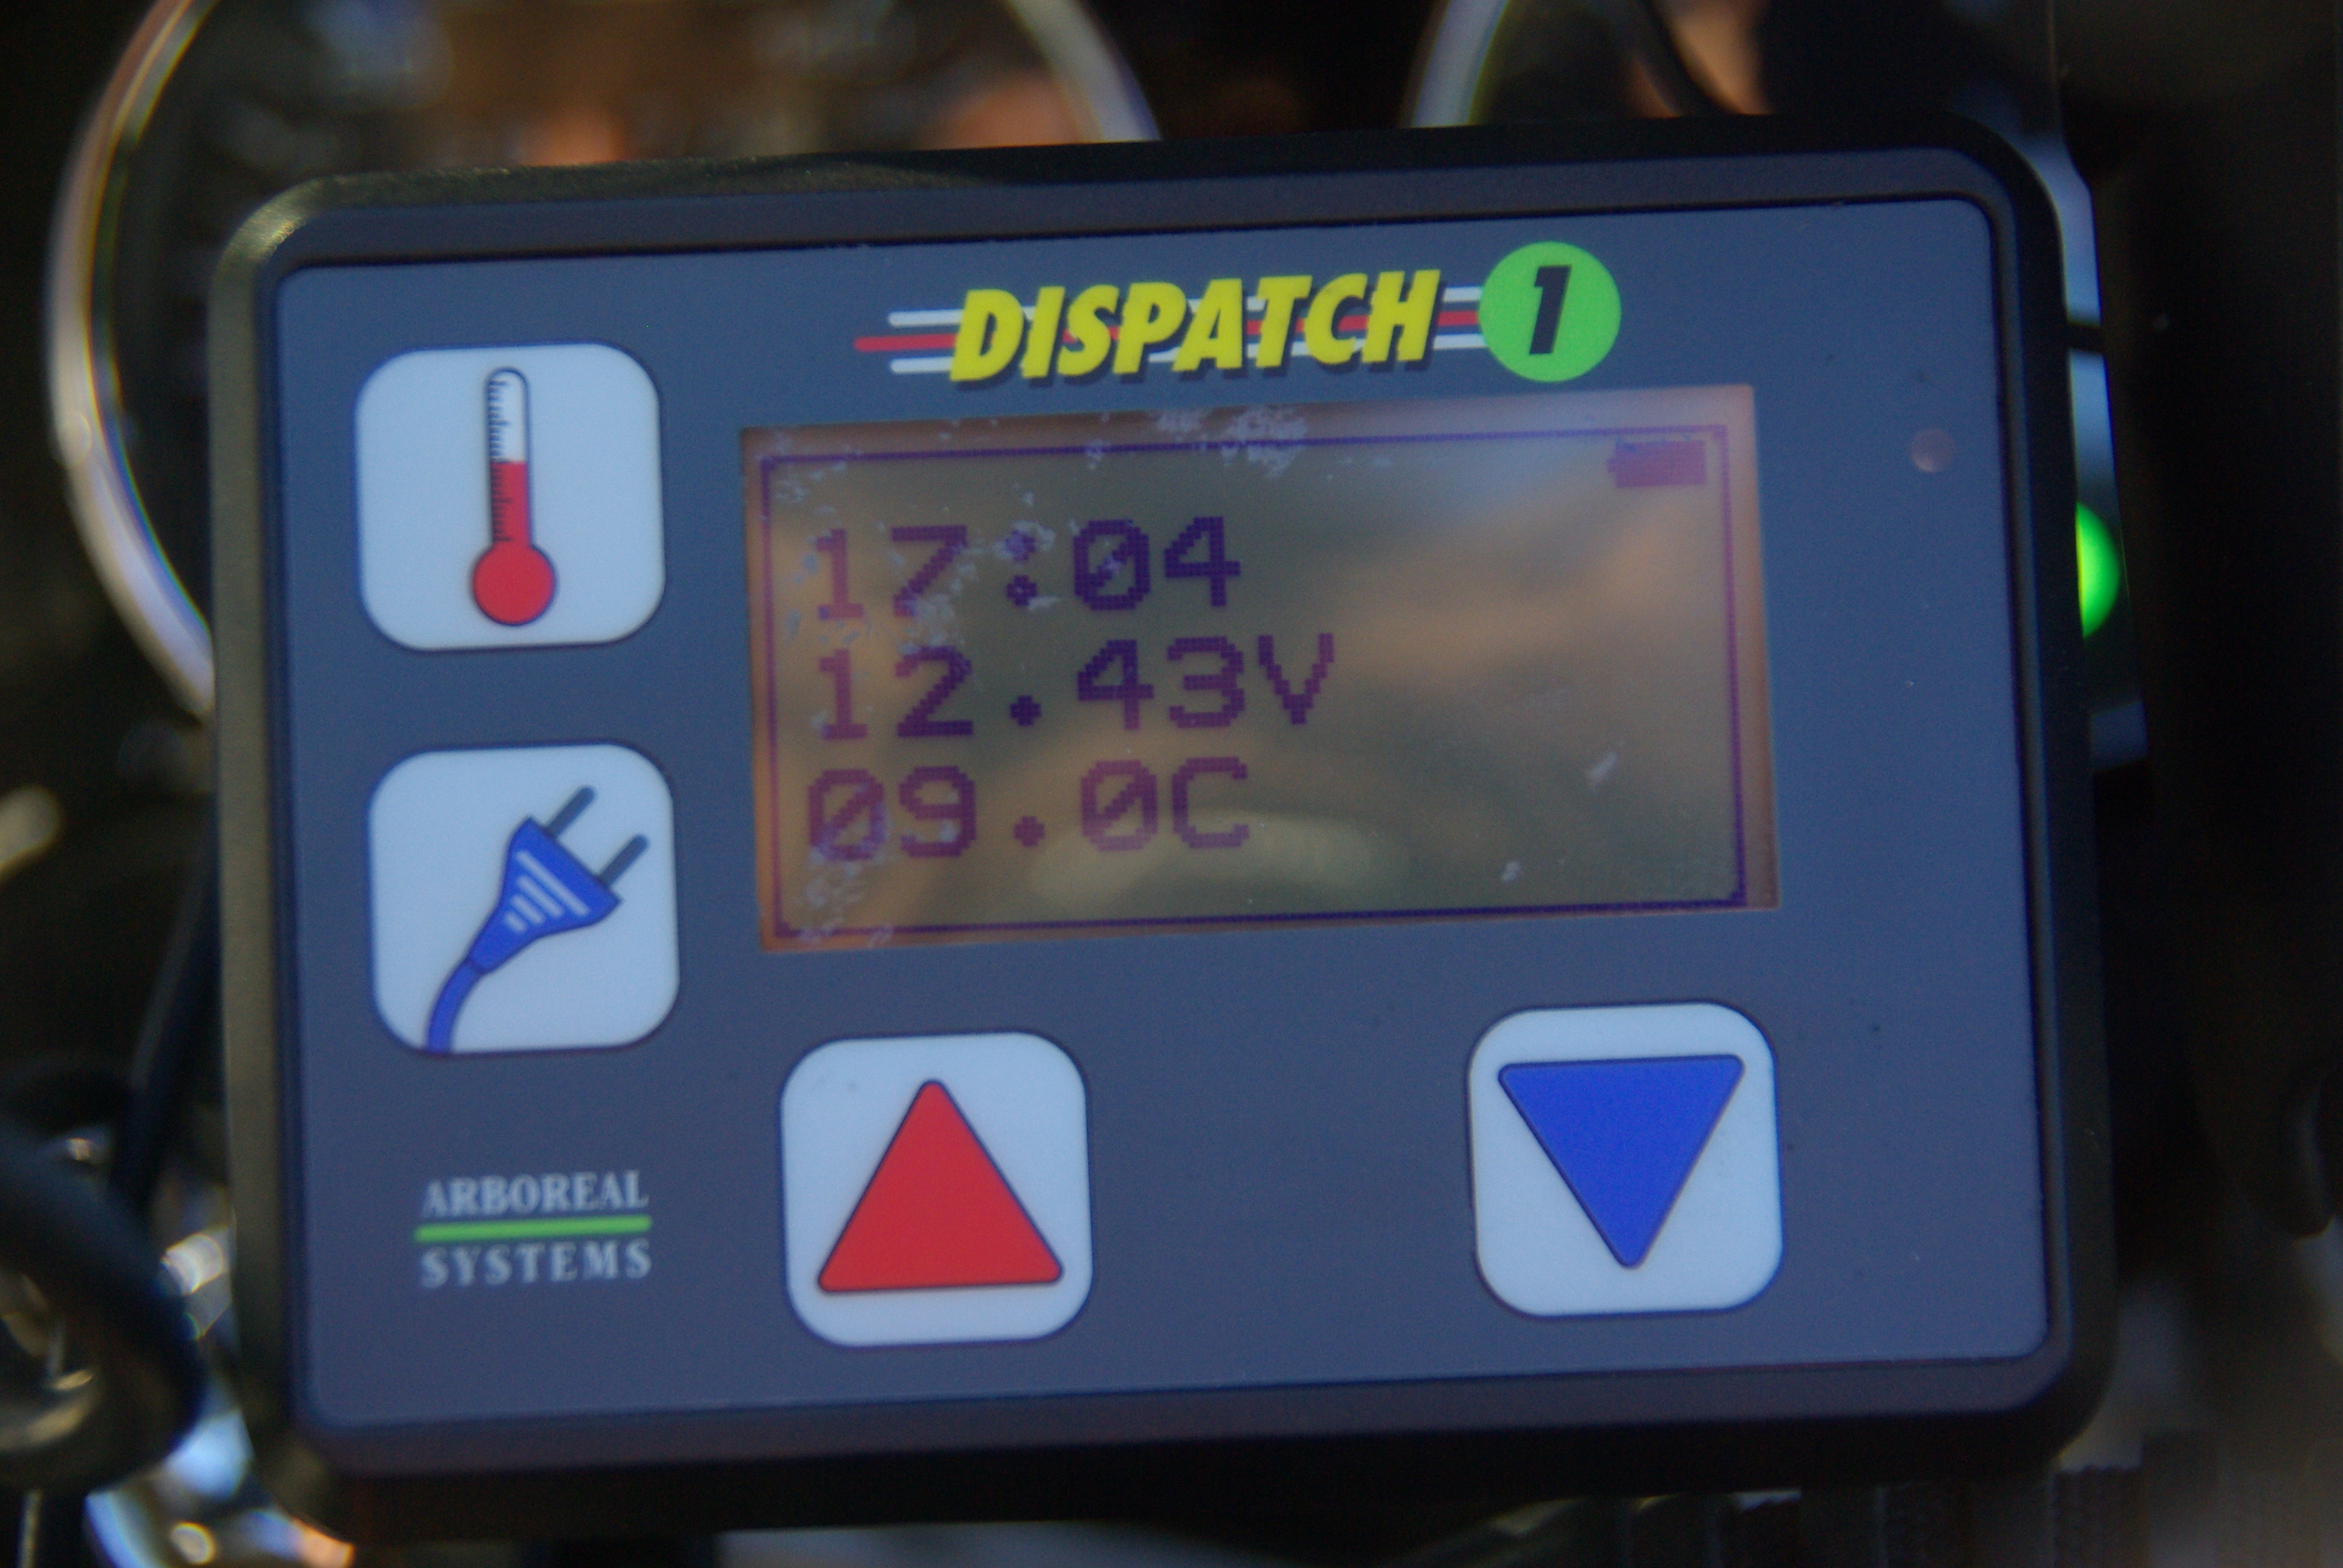
The main display shows the time (not needed here, but useful), the temperature (very useful, I have attached the temperature probe to the oil hose to monitor the oil temperatur and hopefully prevents engine breakdown in the soring heat of the desert ) and the battery voltage (veeeeery useful, it gives me valuable iformation about the condition of the battery). The latter is needed to check if the electrical system is in good health. It does not substitute a proper measurement of the charging current that I will do at a later stage to investigate if the alternator produces enough energy for all the electrical appliances, but it is a good indication. Remember, the max. output of the alternator is only 170 W. A 2012 R1200GS Adventure has an output of 720 W, that’s 4 times more! I have connected a lot of additional farkles and heated garments are not possible to use. The additional Krista lights draw most of the power and have to be used wisely. Another advantage of the Display 1 is that I can easily switch off the devices, even during riding. This means I can use all farkles while riding with low beam and switch off the ones with an internal battery when I need full lightning power at night on winding roads. As I said, I need to measure the exact uptakes and their effect on the total power using a clamp meter.
I mounted the auxiliary fuel tank again, together with the little puke tank and the vent tube. The whole system worked very well on my BMW during the last two years and is very reliable.
The fairing…well, er….looked horrible after the wrinkle desaster (see last post). I tried to mend it by grinding the worst bits, add another layer of black paint and two layers of clear varnish. Before the last step, I applied the stickers and lettering. In the end, it looks quite OK :-) if one doesn’t look too close at the finish. I mounted the fairing holders and fixed the fairing. A test ride today showed me that I will have to modify the bottom of the fairing, it scratches on the tarmac way too early.
Sooooo….what does the baby look like now?
[…..]
Ta-daaaaaaaaaah!!!!


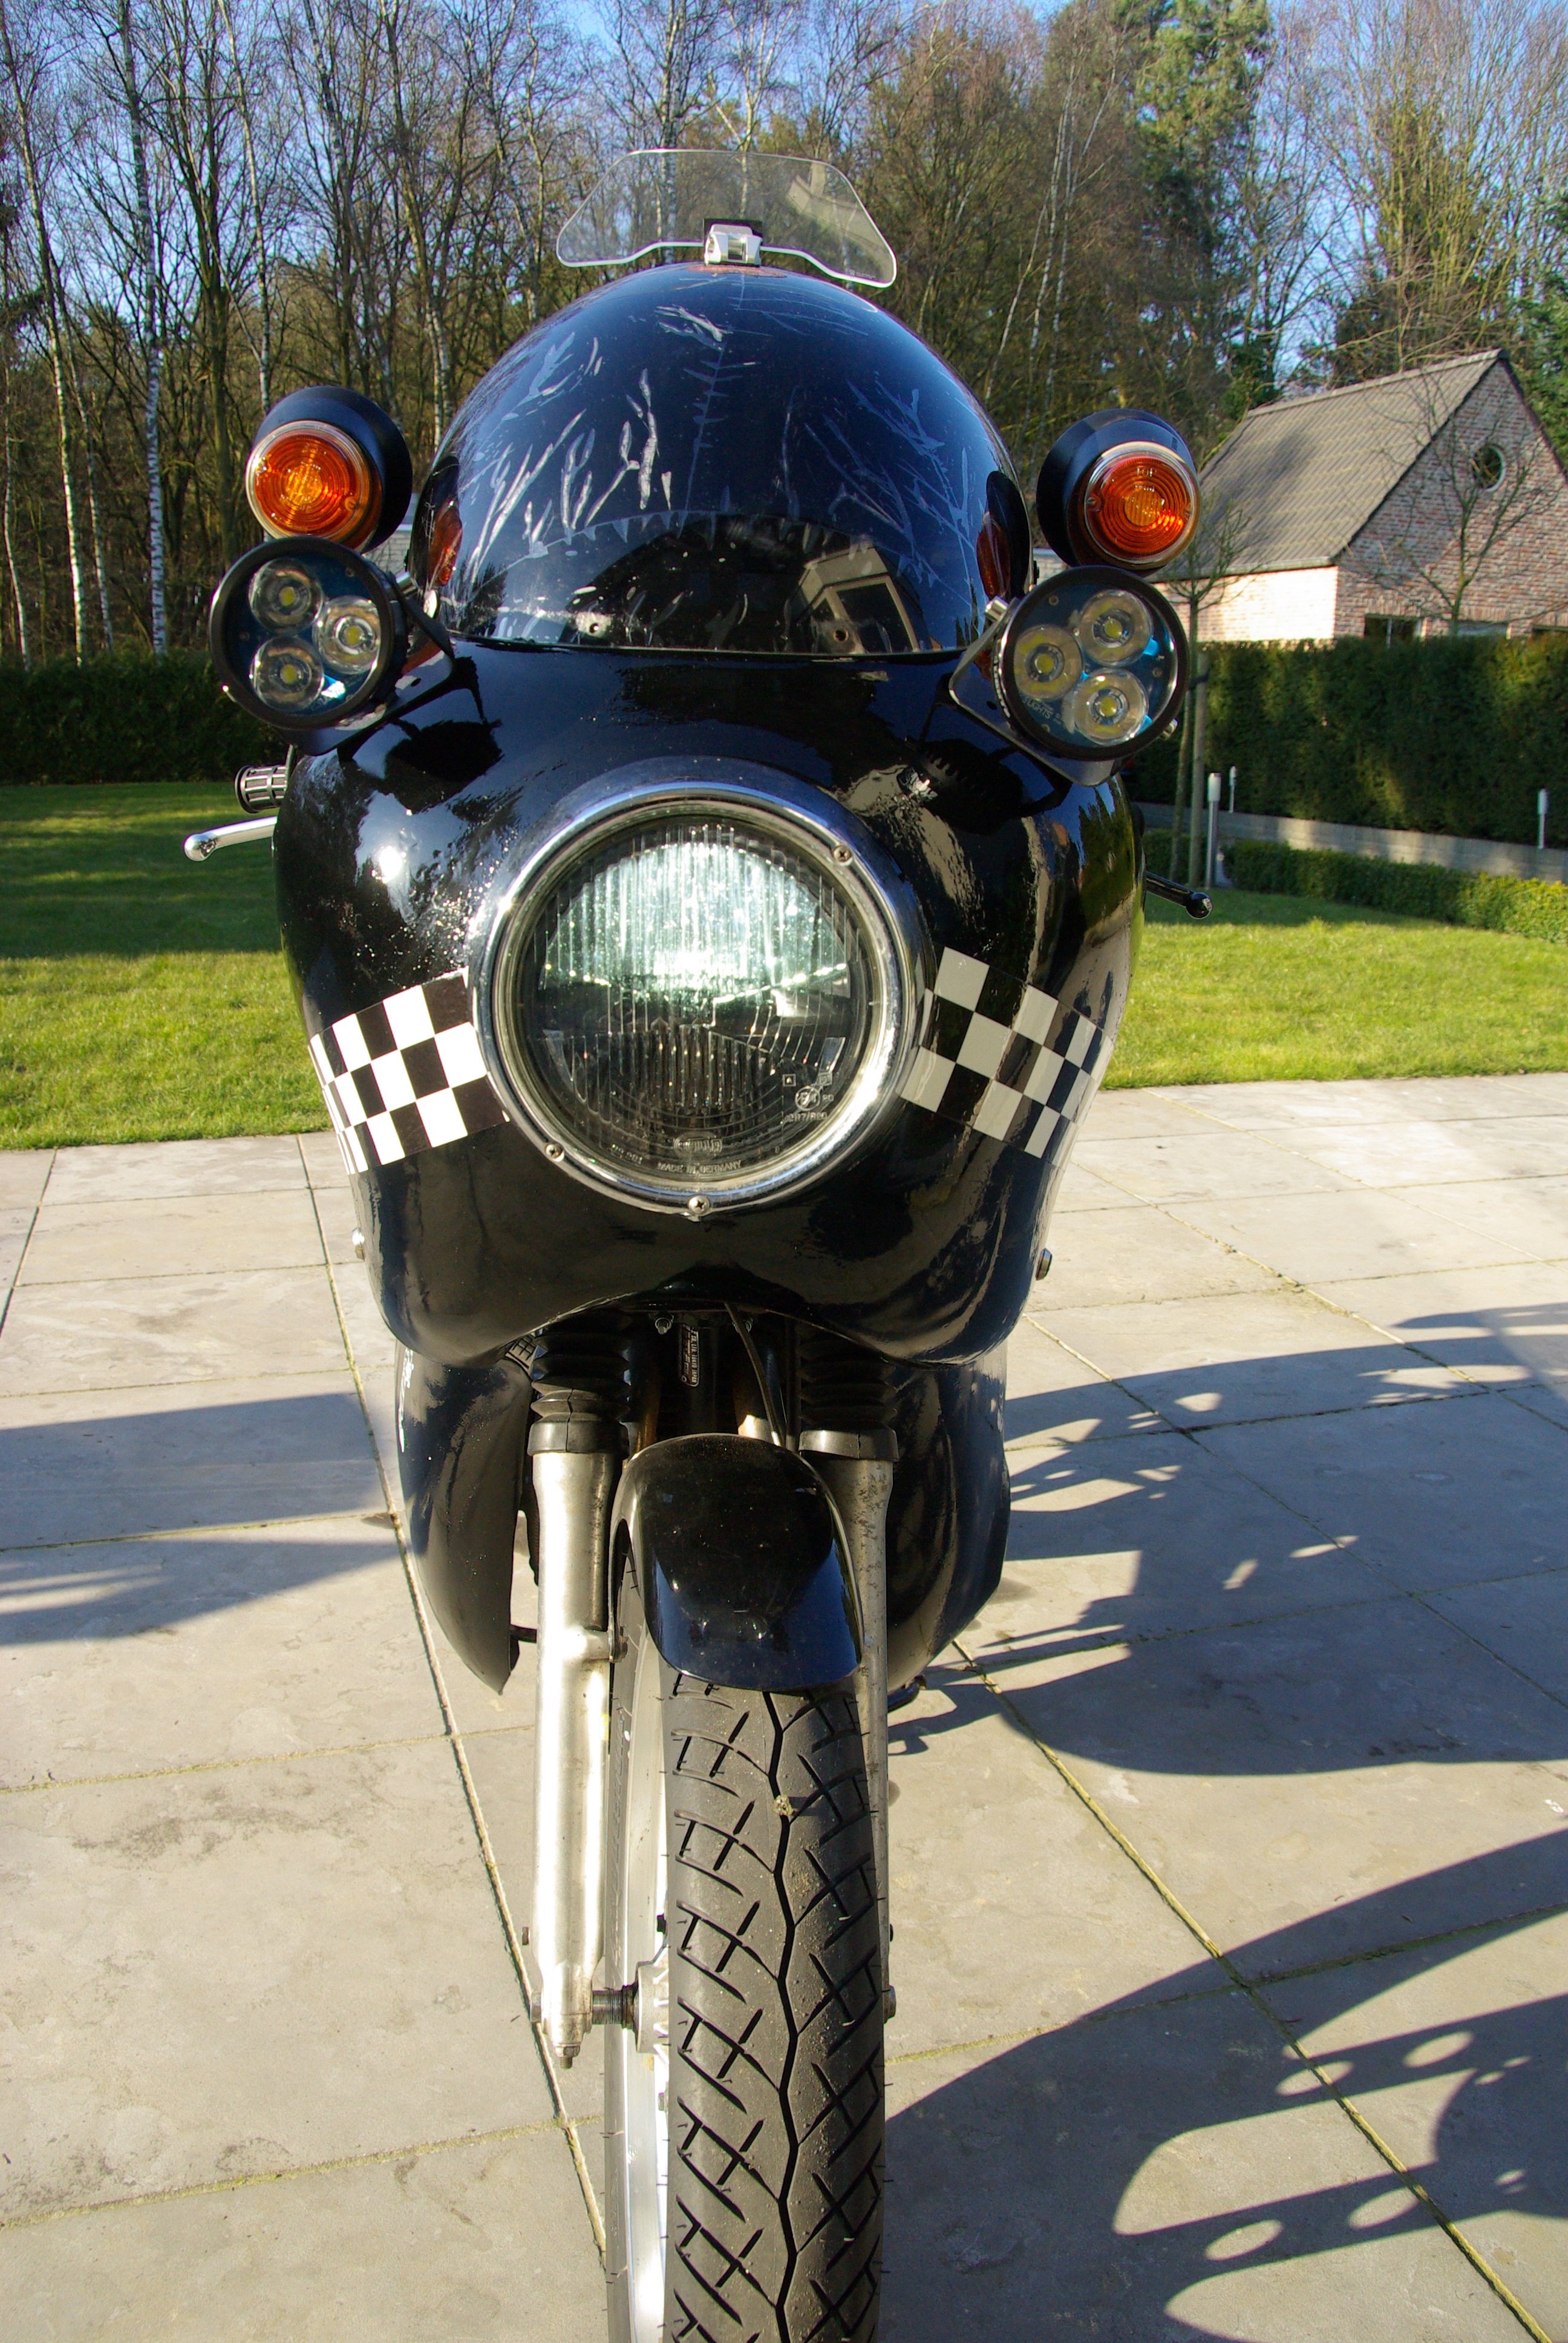

 Looks quite OK :-) .There are still some things to fix and some preventive maintenance to be done, but the bike is getting ready for the thousands of kilometers of test rides that I want to do before the start of the Iron Butt Rally on July 1st.

Leave a comment