The XBR was refurbished some 18 months ago – another used, but younger motor and a lot of goodies and new spare parts. I rode it for 1000 km last year and had no issues (of course). As written in the last post, I had the crazy idea to build a tyre rack to carry two whole wheels. I had welded a plate for my rack in the back. This means that this time I will leave my big box at home. I had the idea to keep the rims in place by attaching an axle to the rack. My friend Heinz helped me and even sacrificed an old front axle of a CX500! The diameter was exactly turned and adjusted to my rims:
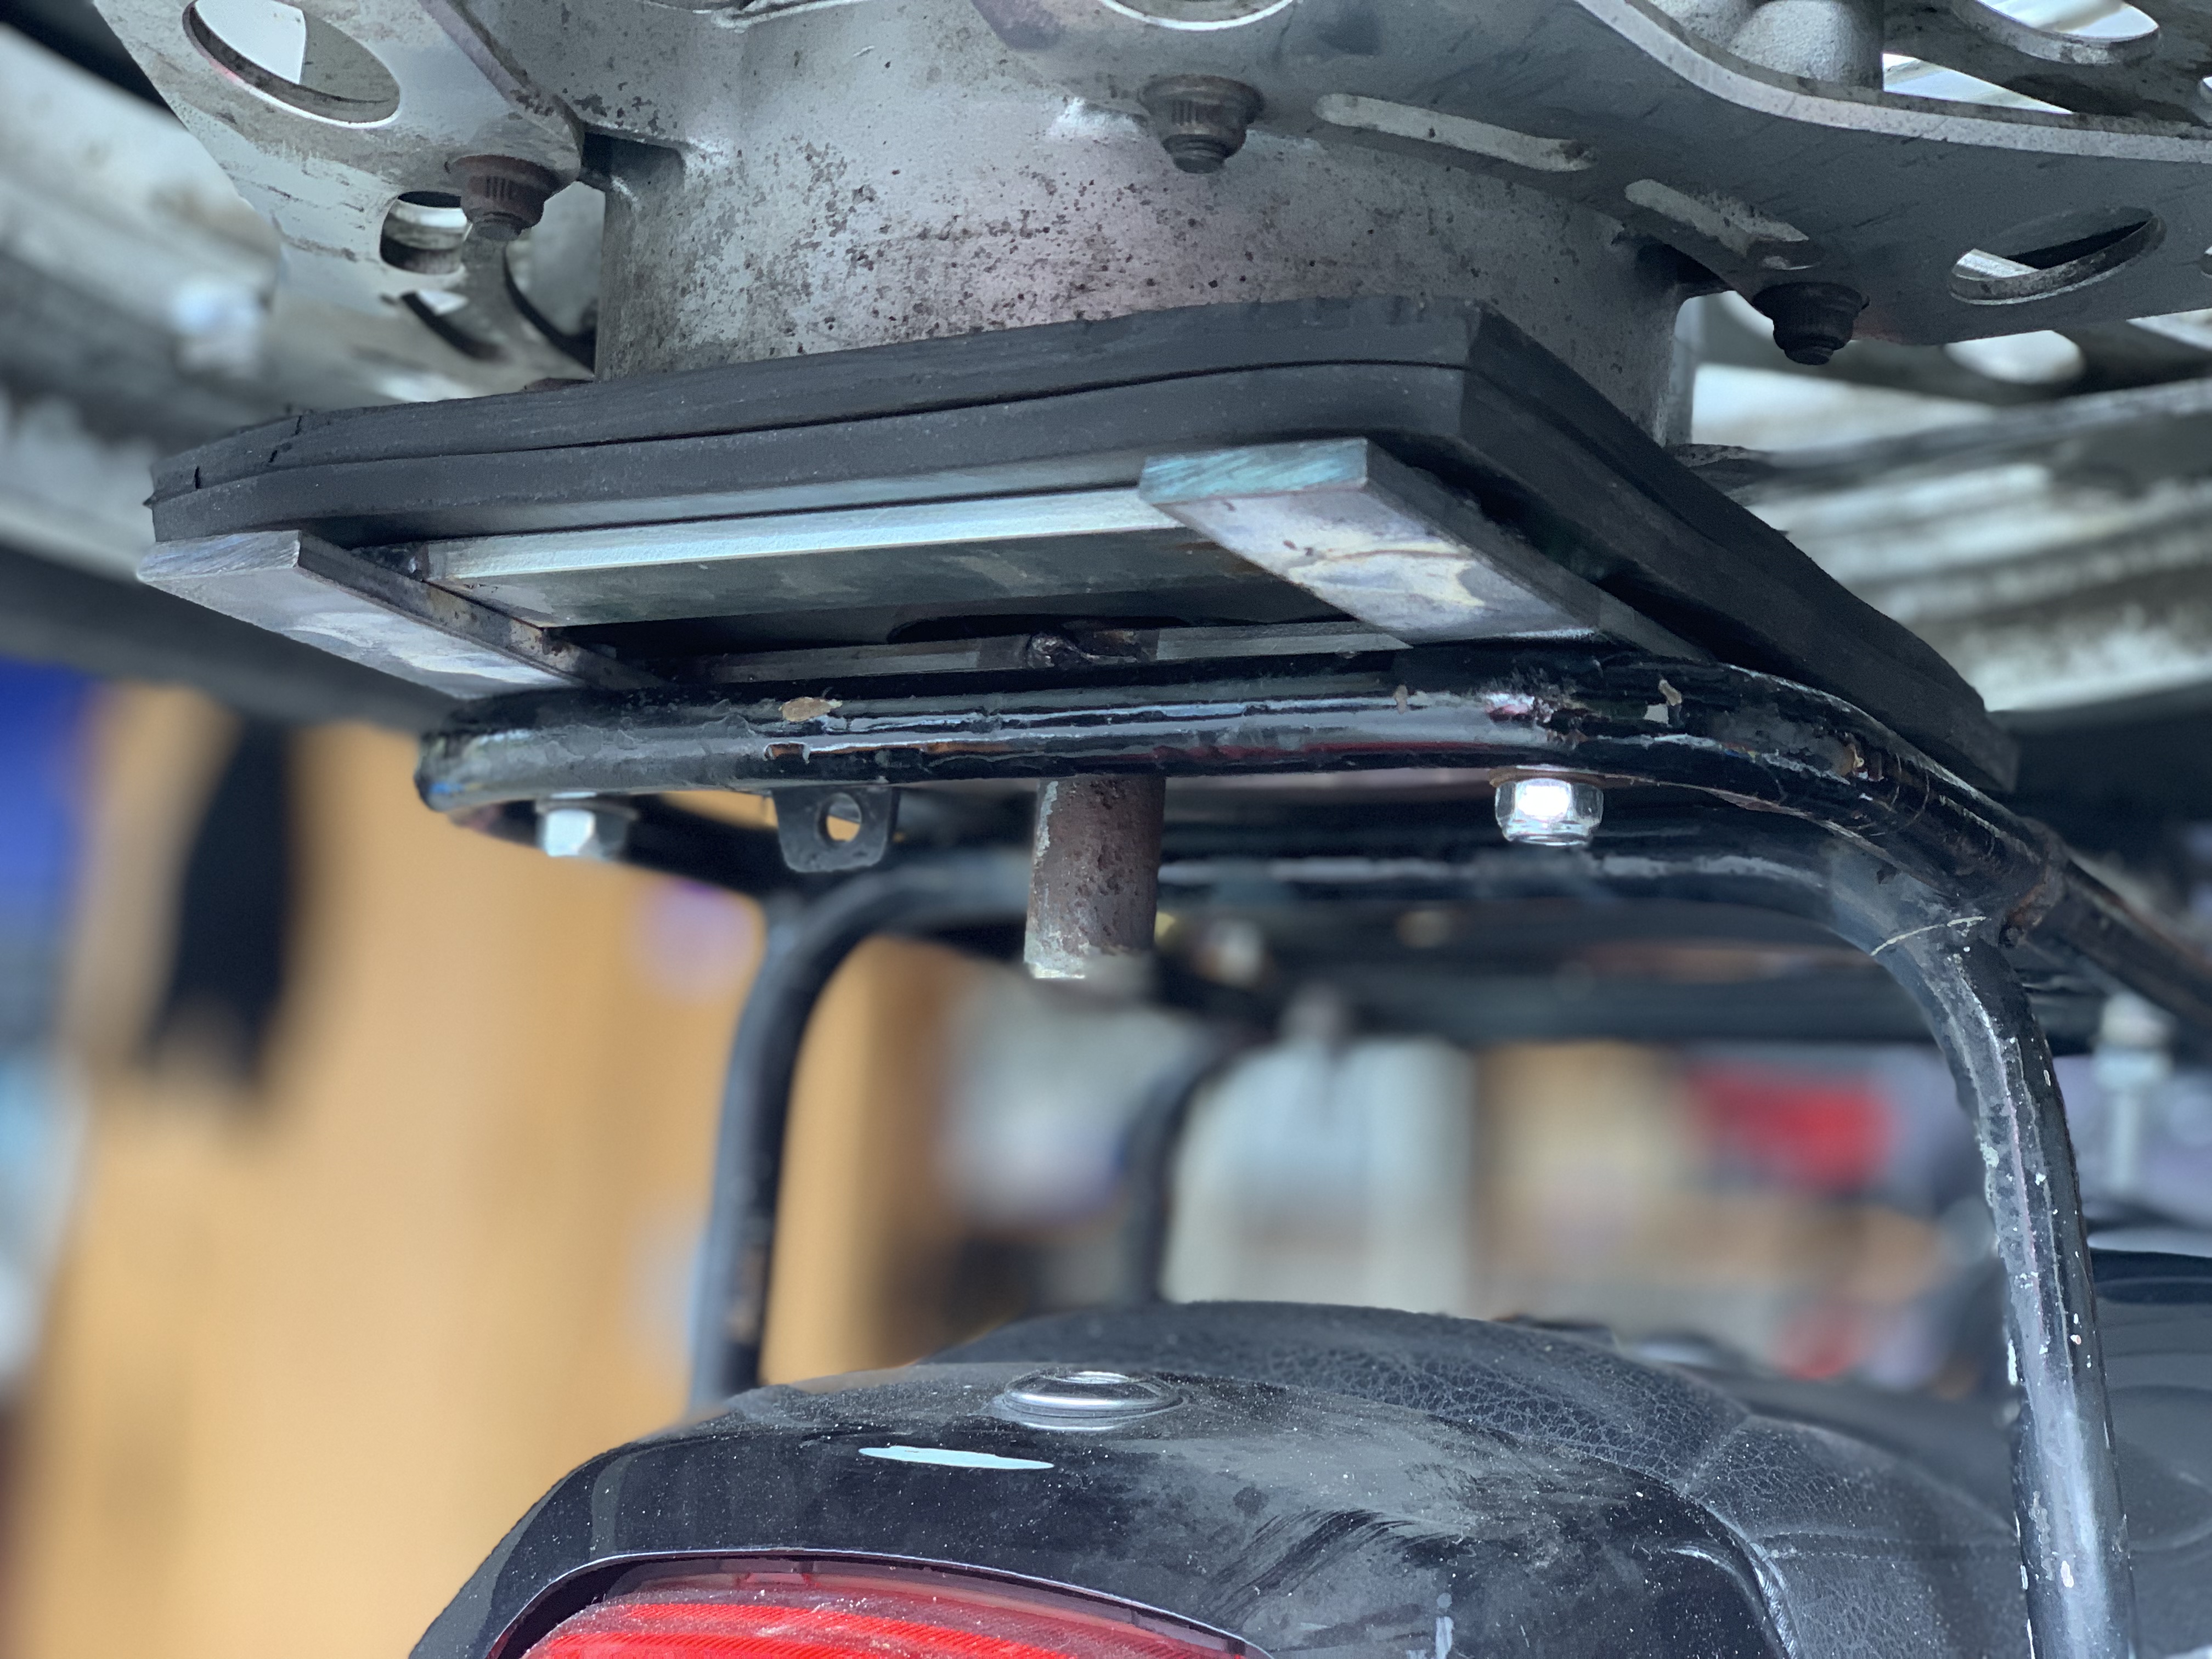
Together with some rubber plates (thank you Mark!), I built a rather stable rack that should keep the wheels in place: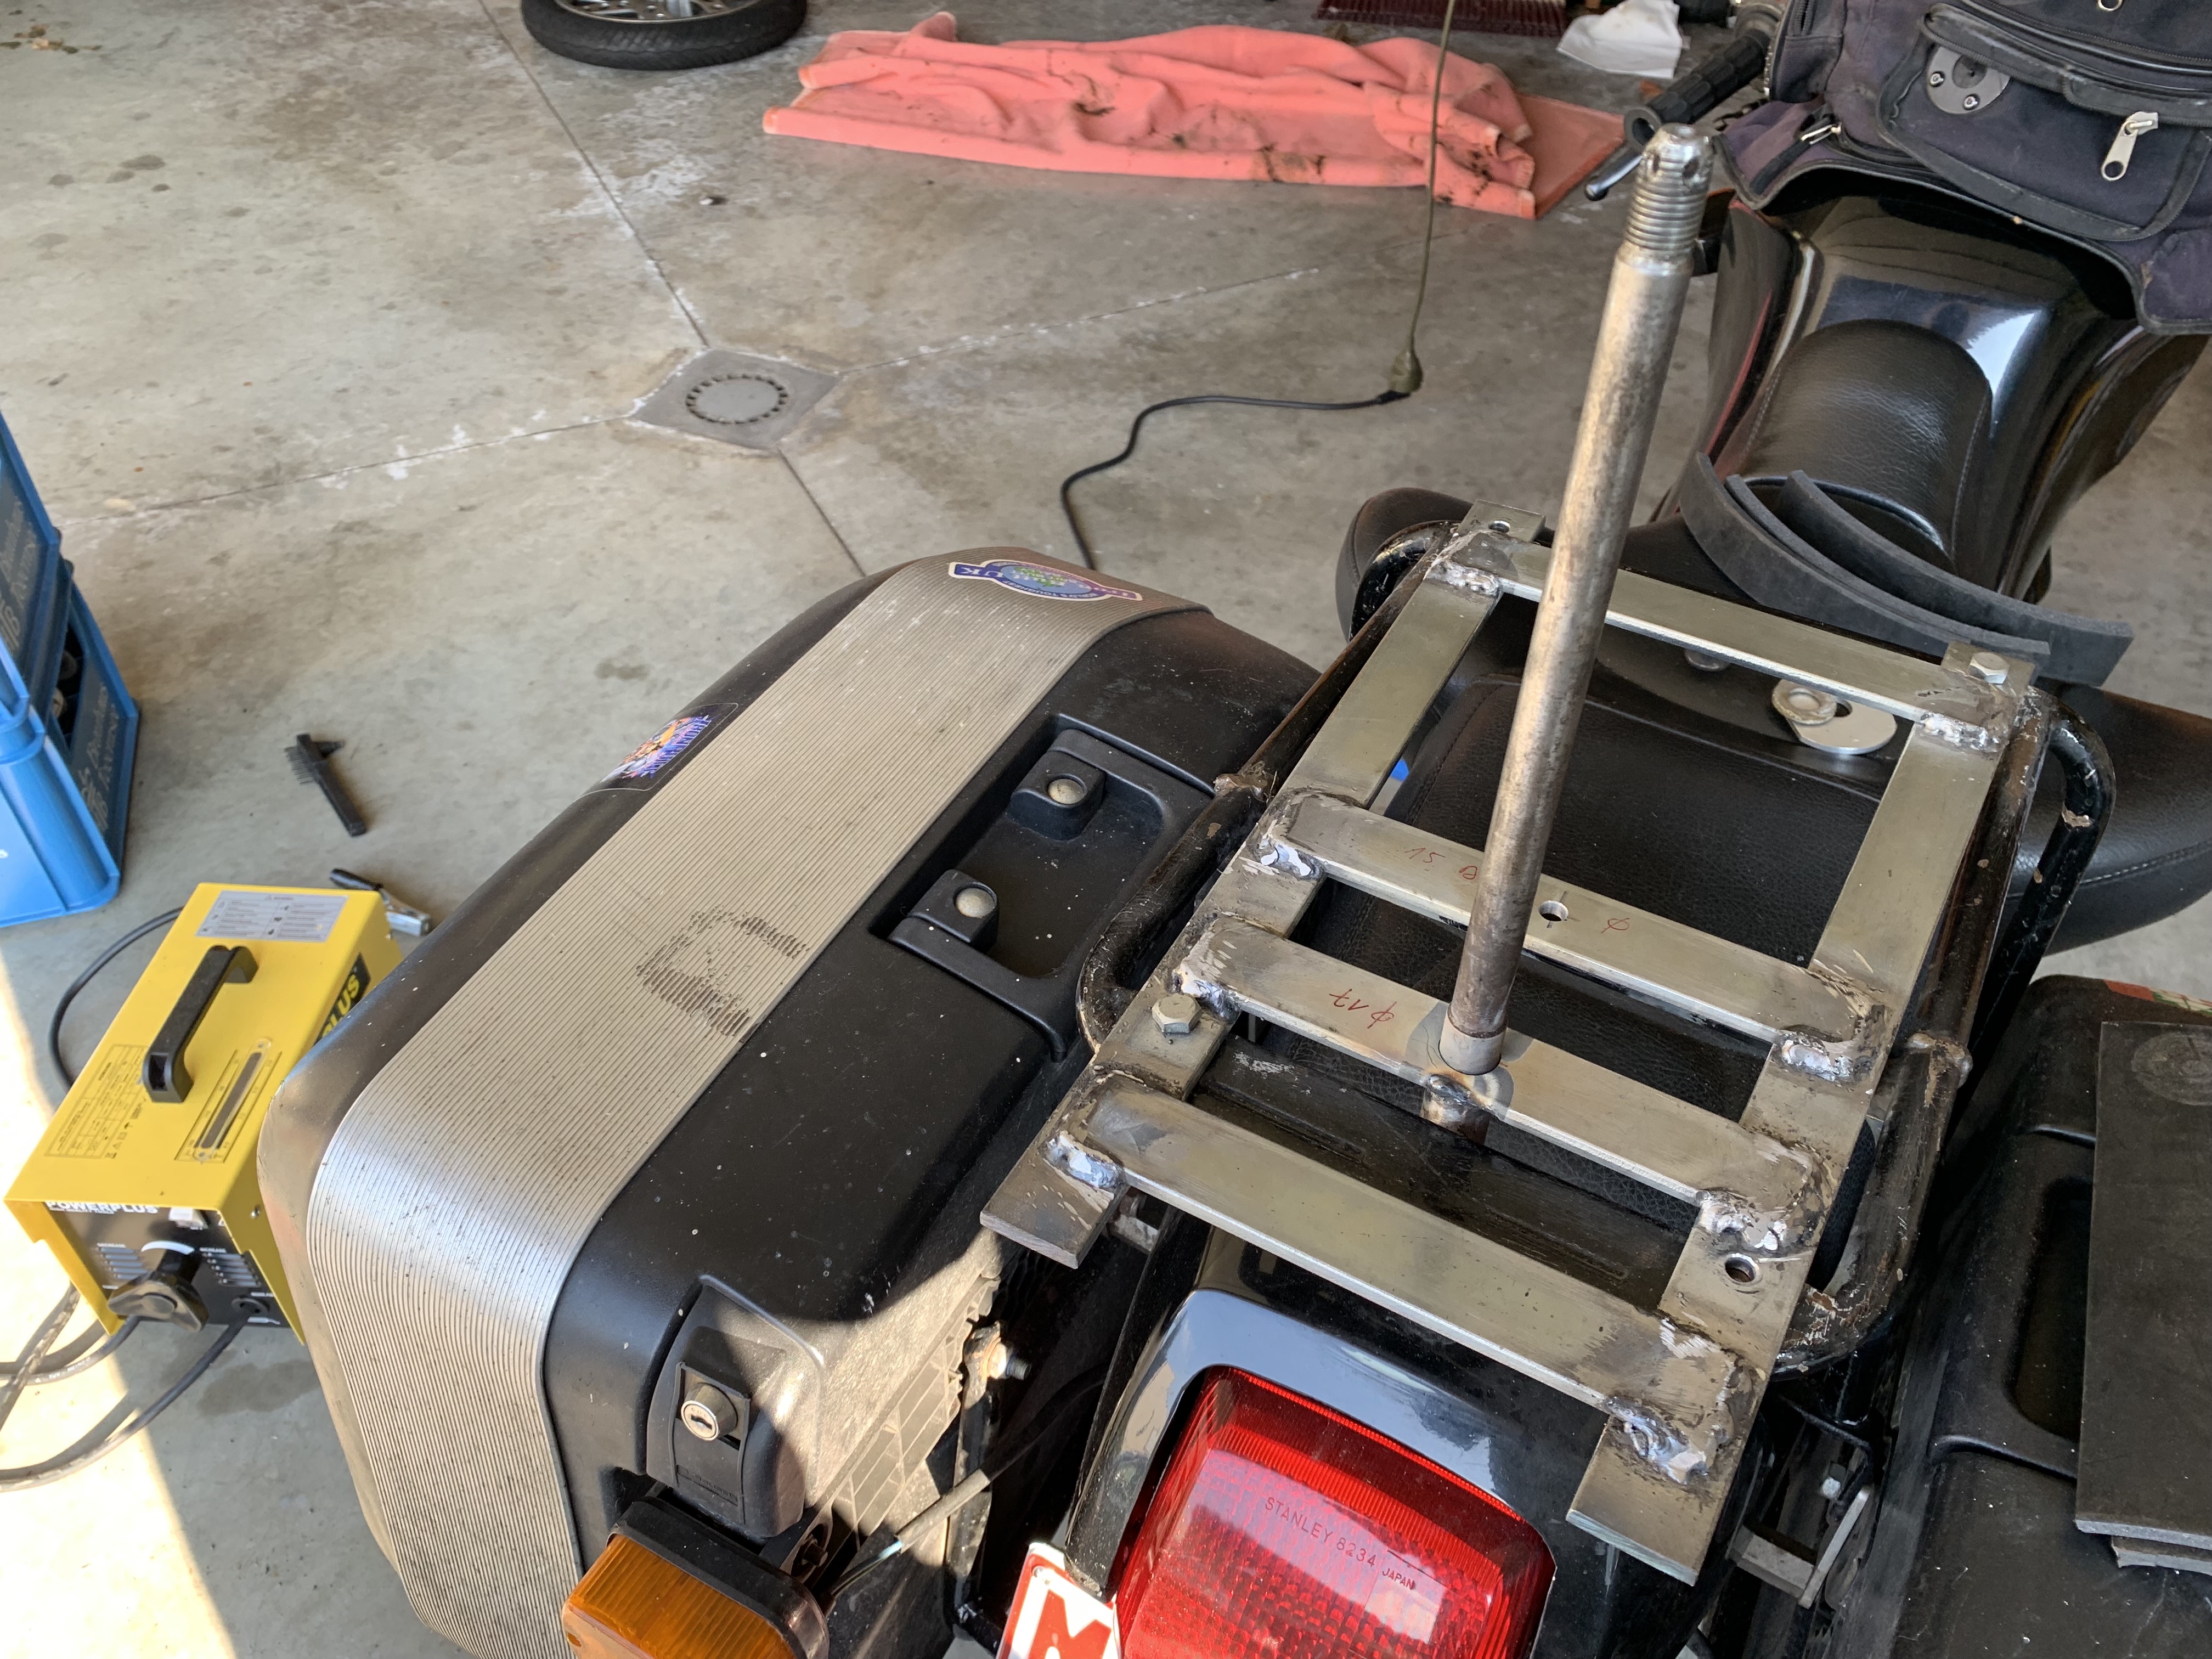


I discovered another problem…the type plate had suffered during the ‘fairing period’ in 2013 when I had attached Harri’s Habermann fairing during the 2013 Ironbutt Rally. The clamp broke the plate apart and entering Russia in 2016, I had to discuss with the Russian officer that yes, the plate is not entirely visible, but it’s the VIN in the frame that counts, doesn’t it? I got away with this, but I expect the Japanese customs officials to be more bureaucratic, so I needed a replacement. My friend Ton managed to get me some printed copy of my plate, thanks for that! However, I did not look exactly like an original type plate. In Europe, this should not be a problem, but what about Japan? I played it save and ordered a generic blank plate in Germany. The numbers needed to be hammered in the plate, and it almost looks if it was the original plate…
I did quite some test rides with the two wheels in the back, visiting Germany and England. Over this 1000 km, the rack proved to be stable (to my surprise, actually). I bought a scooter seat cover that I will use to cover the wheels and disguise them a bit.
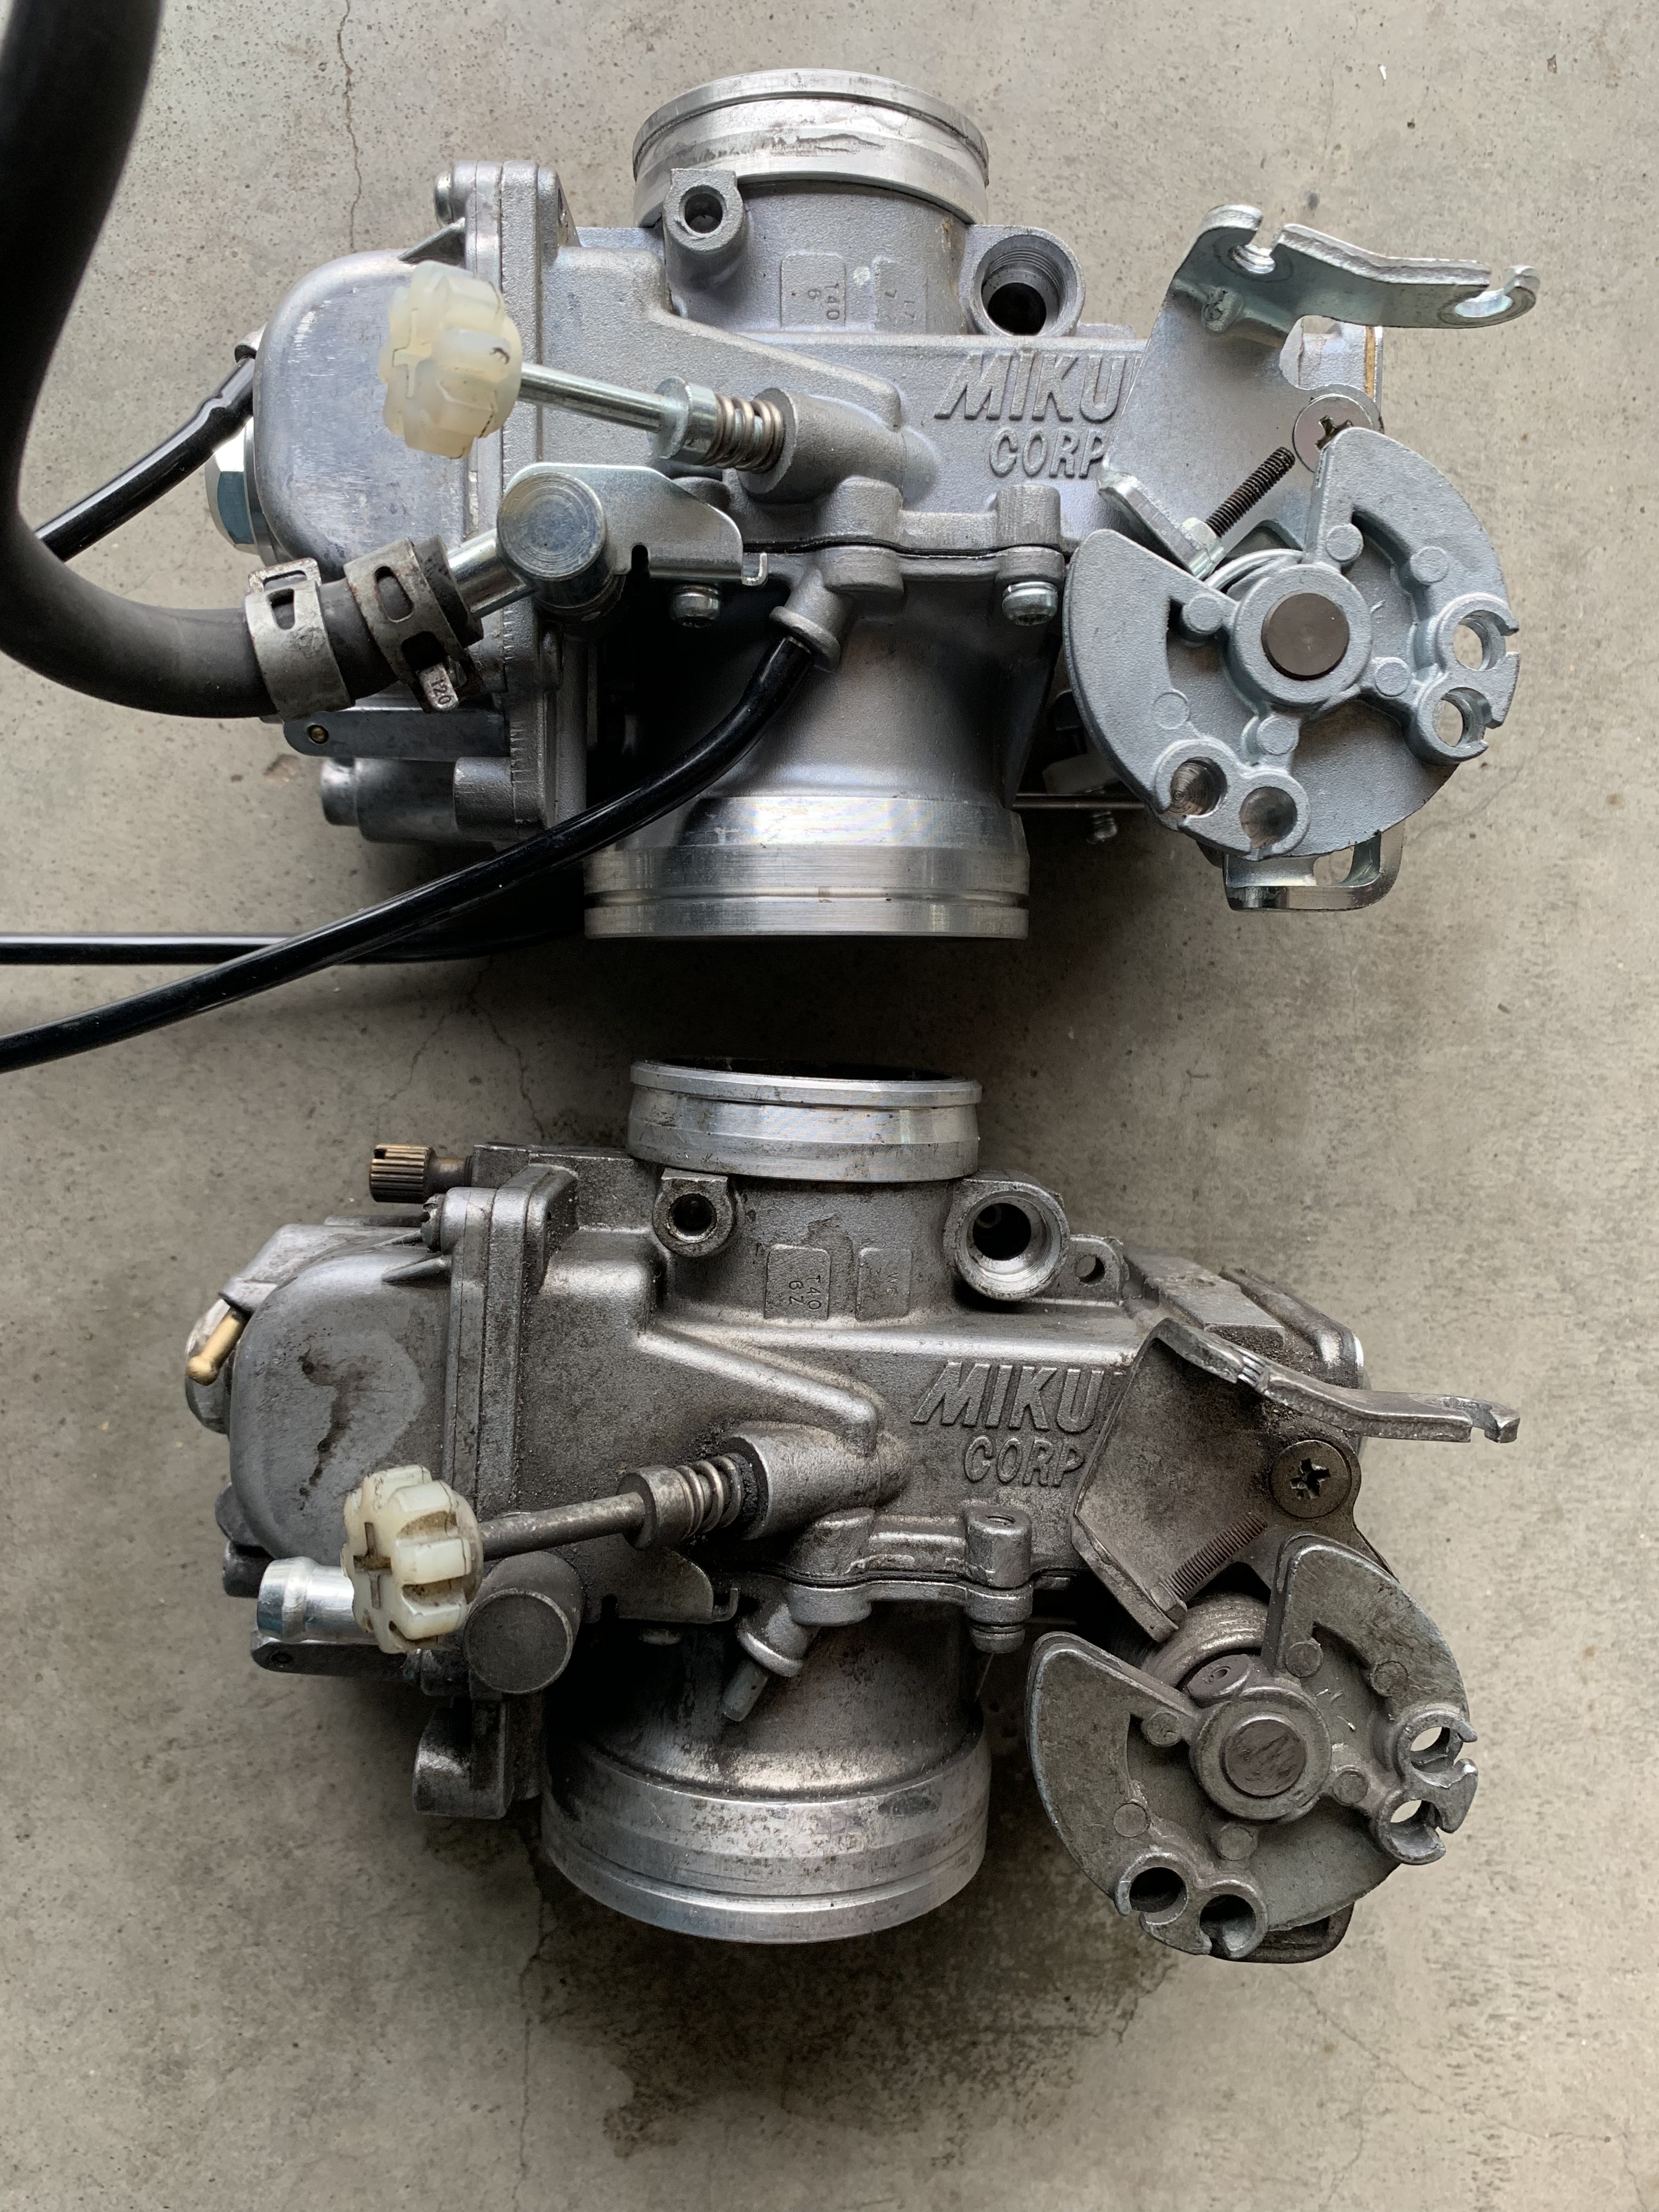
During the test rides, I noticed that the carburettor gave me some problems…idle speed was not fine and once during one ride the throttle would not return to the idle position! I had a closer look at the carb…indeed, it seemed that the throttle did not move back smoothly. Hmmm, could it be that the Mikuni carb was already worn too much? After only 100.000 km on four continents? Maybe yes. But I still had the grey, Café Racer XBR with a new Mikuni carb, I could change it completely, together with the throttle cables…well, it was almost new. The only person who actually rode this bike after its refurbishment was – John Young when he had troubles with his Explorer and he borrowed the grey XBR from me to get back to England. Finally I swapped the carbs and…the bike ran fine in idle…very stable. Later, I visited Choice from Mainjet.de, the Mikuni expert, and he opened it. Indeed, many parts were worn. It did make sense to change the carb after all.
On my first ride to work, I ended up in a puddle of petrol, the carb was overflowing! Luckily it was a singular event. An additional fuel liter was installed!
I visited my GPS shop in Zolder and they provided me with some open street maps for my Zumo 590. Garmin does not provide maps for Russia nor Japan…I do have limited search function capabilities, but at least I I have proper maps on my Sat Nav.
As I couldn’t find my rain suit (!), I bought a new BMW rain suit at my local dealer. It is expensive, but it comes now with an integrated hood. This means that in heavy rain, no water can run down your neck any more, what a great improvement!
When I returned from my ride, I made a worrying discovery:
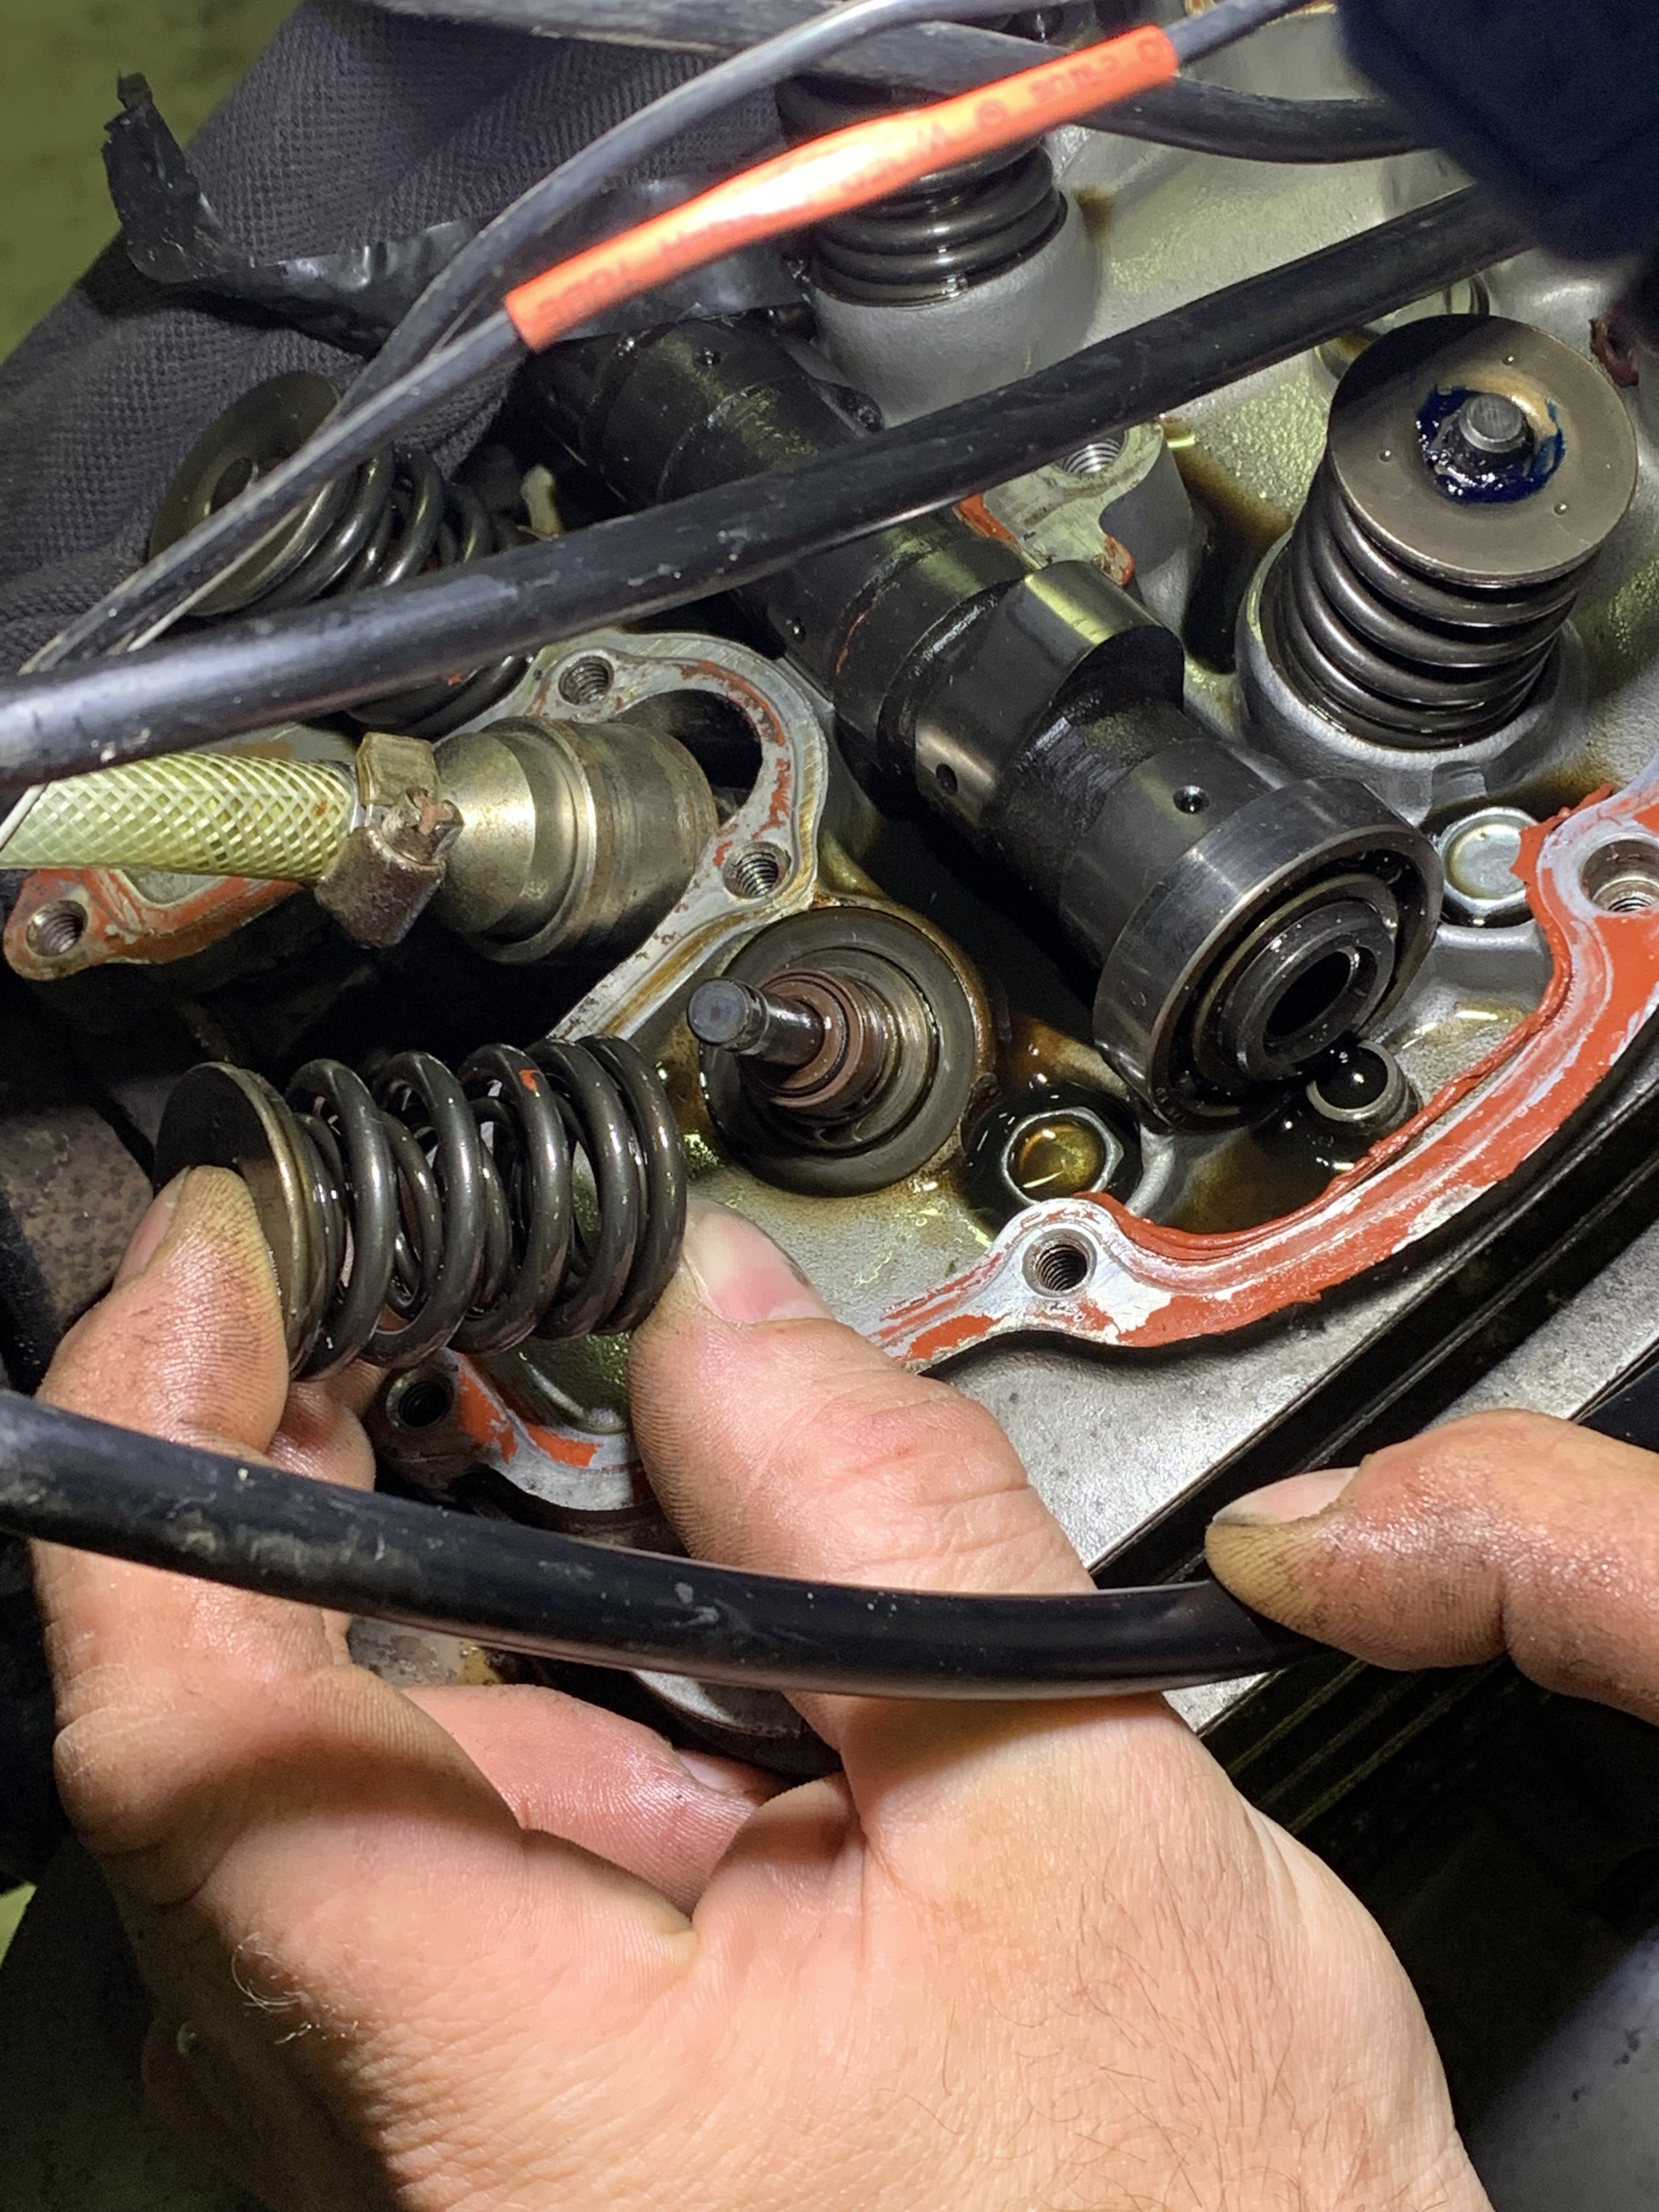
The bike smoked worse than a two-stroke Trabant running on a 33:1 mixture! But only from the left exhaust, only basically at idle speed. Hmmm…this pointed to some worn valve stem seals…A bit rare with the XBRs, but after 34 years, any seal under permanent heat stress can get too hard and lose its function. Only three weeks to go, and now this popped up! One thing was clear: the seals needed to be changed. In theory, I should be able to do it myself. However, my stress level was already increasing, not only because of this trip, but also because of all the other things I had to finish. If I would just ride around in Europe, I would have done it myself. I applied some risk assessment: during this trip, nothing can go wrong. We’ll be too far from home, under too much time pressure to reach Vladivostok to take any risks. I tried to contact some Honda garages, trying to get an appointment for this surgery….no chance. In my despair, I called my old mate Stefan, the best mechanic I know. He squeezed in a short visit to help me with the replacement, ten days before our departure. A 1000 mile trip for him. I ordered some specialised tools for the seal replacement, and got the seals and joints. The plan was to change the seals without removing the cylinder head. This is possible if you blow up the cylinder with compressed air. My spark plugs are smaller than the usual tools for cars, so Stefan sacrificed an old spark plug and turned it into an adapter for the air line. We worked together (compressing the valves, removing the valve collets, removing the valve springs, removing the old seals, putting on new seals, putting back the springs and collets) and after the first valve we got some routine and the seals were changed very quickly. The motor was closed and with great anticipation, the motor was started:
No smoke! The whole intervention was successful! Kudos to Stefan for his help! With the bike finally in good order, this gives a lot of peace of mind…
 I have packed a lot of tools and spare parts, much more than I actually will need, but on this trip, nothing should go wrong. It goes into the tank bag to build up some counter weight for the wheels in the back.
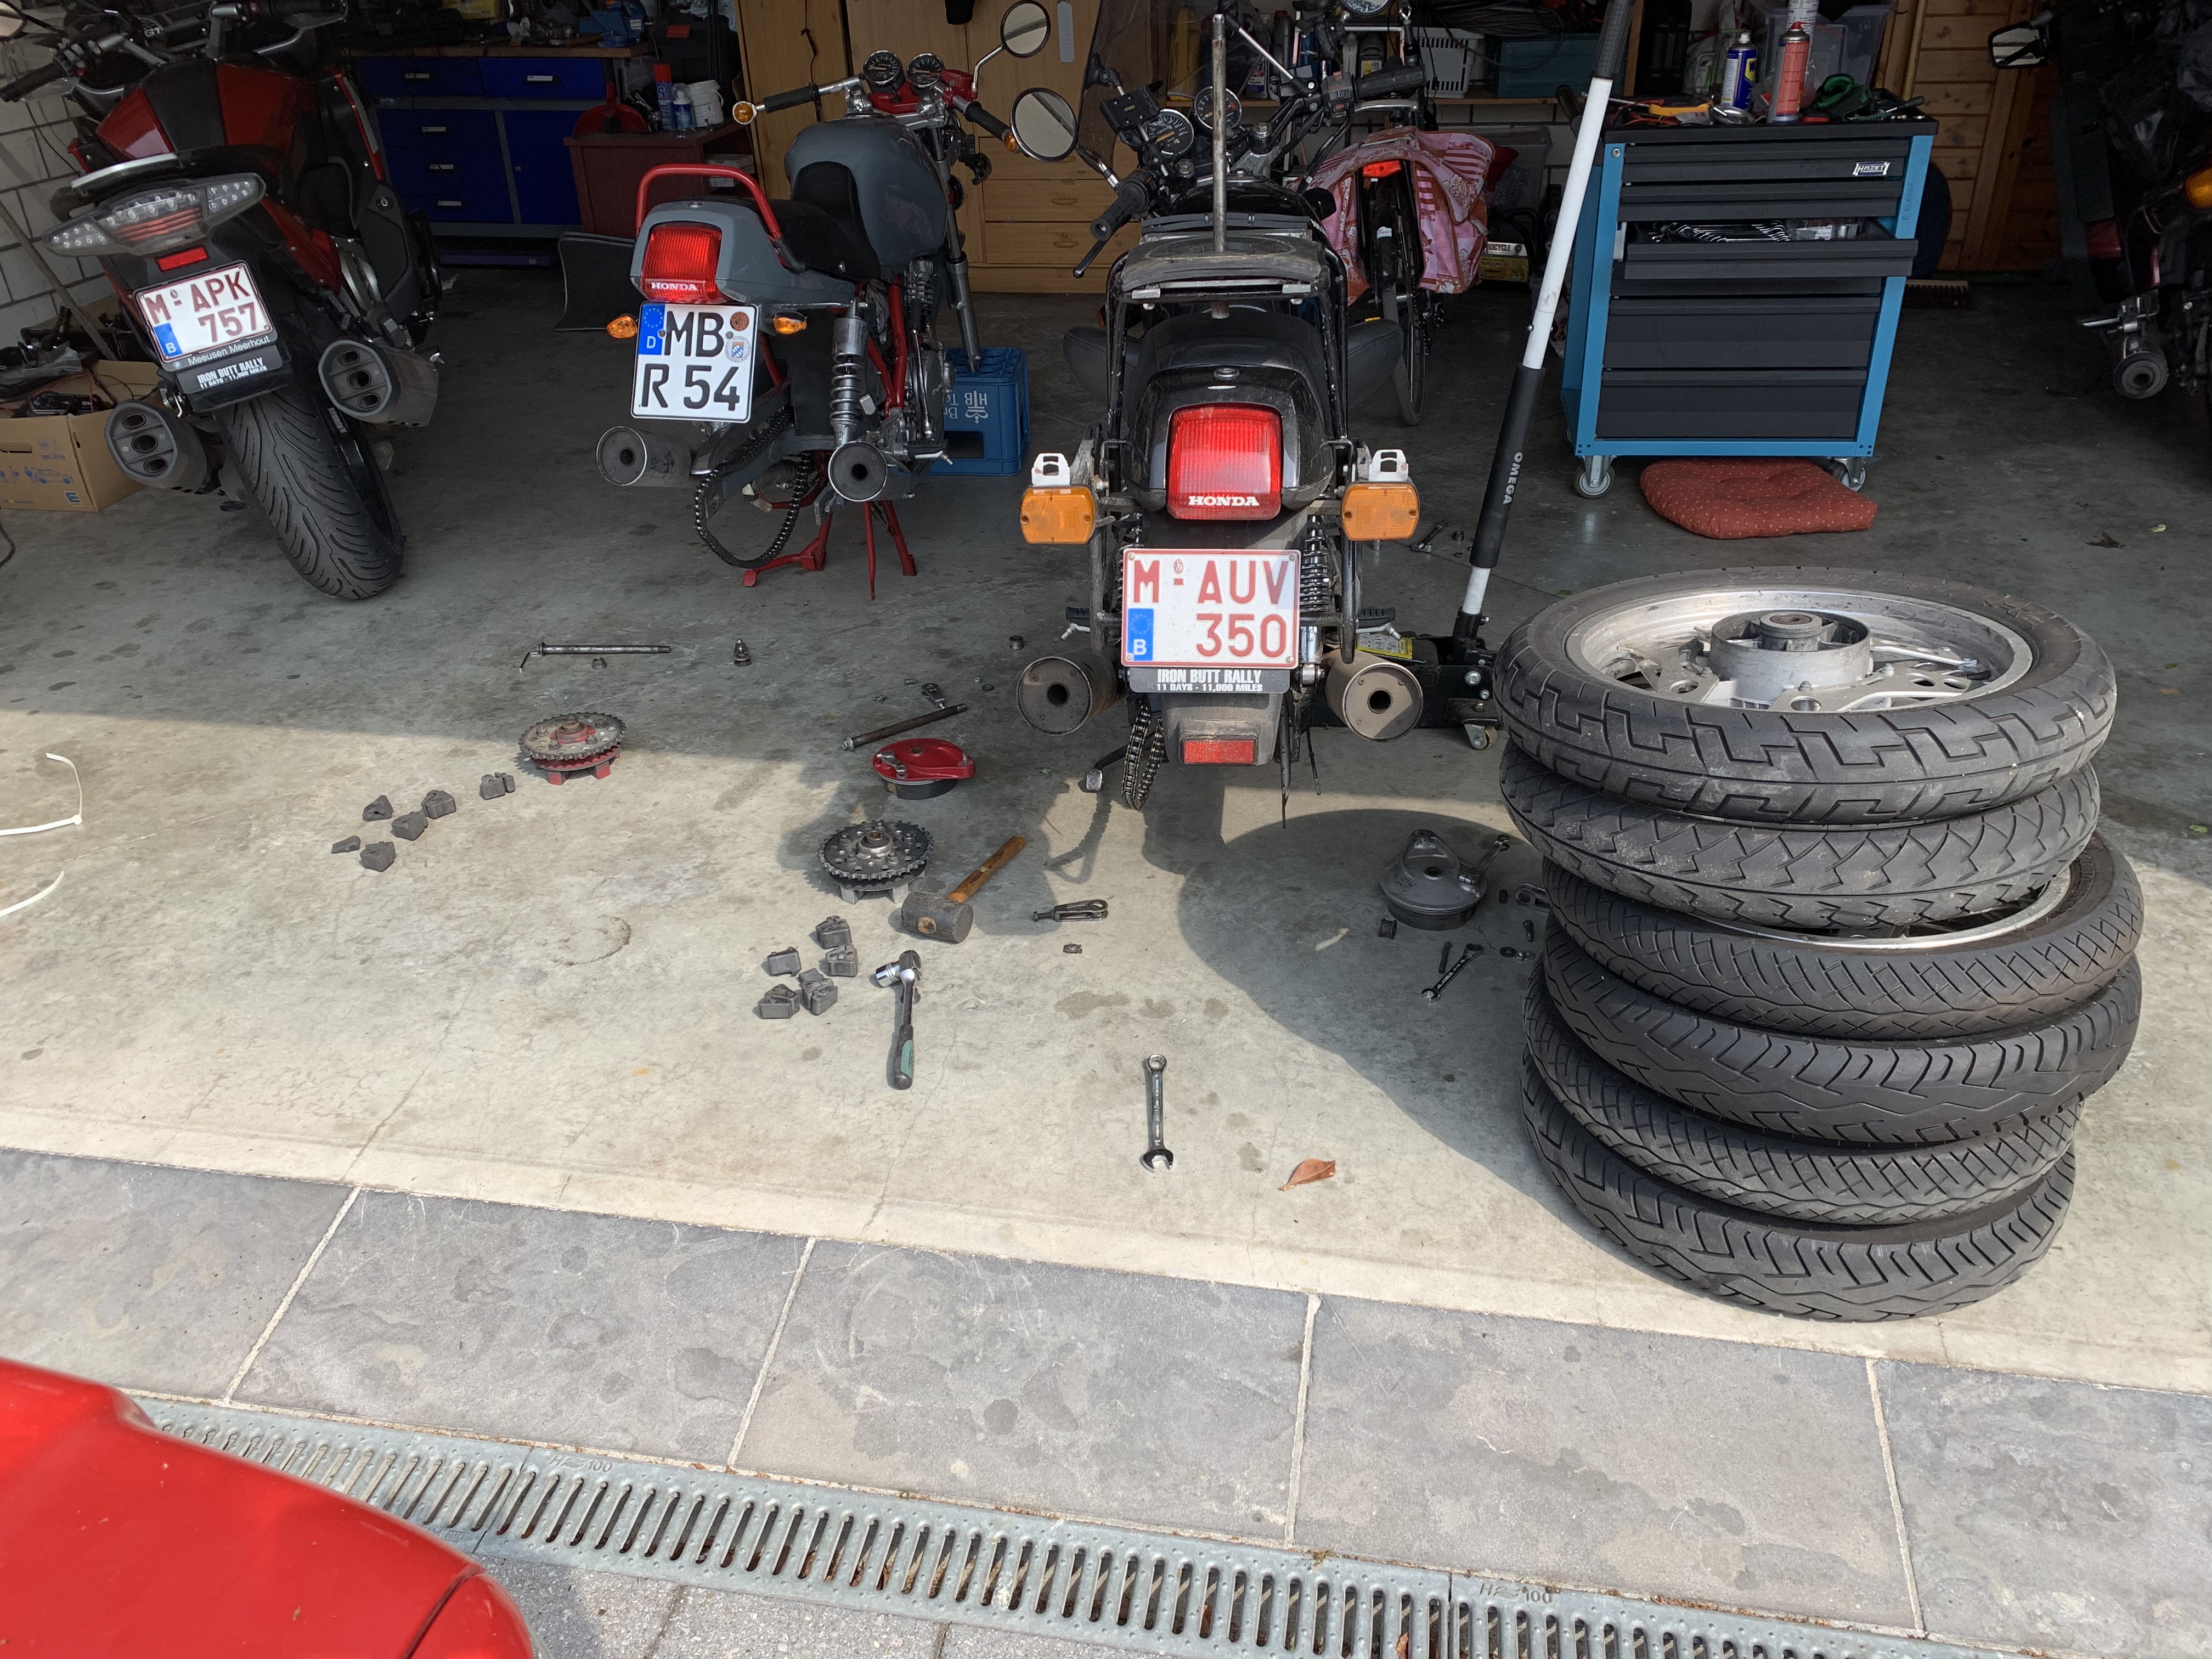
The bike received new tyres, four in total. The cost less than the two tyres for the BMW K1600…
So the bike should be fine. For the next 12.000 km. Or 15.000 km. Or 18.000 km.
I still had to some paperwork…I needed to get a Carnet de Passage de Douane (CPD) for Japan. It took some weeks and a deposit to get the important document. The transport back is also arranged. For the bike and for me. I requested the insurance green card for Russia. I contacted Honda to find out where the XBR was built. After many attempts, I was told that is was produced in Kumamoto. So I will ride to the south of Japan as well.
I had started to learn some Russian online, but I couldn’t find enough time. My plan to study some Japanese was not successful. I did some basic study of Japan places to visit. But in the end, I will have two days on the ferry to make my final plan, having a look at the weather forecast.
You can follow my ride by watching my SPOT GPS track: https://spotwalla.com/tripViewer.php?id=1e0255ce46bfb61968&hoursPast=0&showAll=yes
Before I start to pack my bags next week, I go for a little ride to Britain – same procedure as every year! As the defending champion, I will ride the Brit Butt Rally 2019 this weekend, starting in Leicester. The little XBR still has to wait, this weekend it’s time for the beast again – the BMW K1600.

Leave a comment